Movilitas.Cloud application provides the Novumgen channel to establish a connection to Novumgen.
By default, the connection is automated, meaning that communication does not need human intervention. However, the users can monitor and manage the outgoing transactions (=towards Novumgen).
You can configure the Serialized Manufacturing application with the Novumgen channel. Movilitas.Cloud - including the Serialized Manufacturing application - acts as a gateway between SAP ATTP and Novumgen systems for serialization purposes. The Novumgen channel offers two connections:
- An SFTP connection to upload the shipment files to Novumgen.
- A SOAP connection to request serial numbers.
Once the Novumgen channel is configured:
- You can view the status and other details of the outgoing transactions.
- You can manually upload a file to Novumgen and monitor the processing of the file.
List of Procedures
- Configuring a Novumgen Channel
- Monitoring Outgoing Transactions (Outbox)
- Uploading a File to Novumgen through SFTP (Outbox)
For more information on the general channel actions, see Managing Channels for a Tenant (Overview).
Configuring a Novumgen Channel
Procedure
1. Go to Movilitas.Cloud Console --> My tenants.
2. Select the tenant or click Open tenant next to it.
3. On the Tenant Dashboard, select the Channels tab. The application displays the list of channels assigned to the tenant.

4. Depending on your setup, create a new Novumgen channel or modify an existing one. Follow one of the procedures described in the table below.
| # | Create a Channel | Modify an Existing Channel |
|---|---|---|
4.1 | Click the + icon (Create channel). The application displays the Create channel dialog. | To search for a Novumgen channel, use the search field and the filters:
|
4.2 | Select Business channel as the type and click Create. The application displays the Create Channel page with an empty form to give the basic parameters of the channel. | To view the channel information, click on the channel name or the edit icon (Edit channel) next to the channel. The application displays the Edit Channel page with the current channel settings. |
4.3 | Enter a name for the channel and select Novumgen as the source. | N/A |
| 4.4 | Click Create Channel. The application informs you about the additional costs. After confirming the creation, the application displays the Edit Channel page with a form where you can provide the connection details for the channel. | N/A |
Example when creating a Novumgen channel:

5. Provide the settings for the Novumgen channel as explained in the table below:
| Parameter | Action |
|---|---|
| Support email | Enter the email address where Movilitas.Cloud can send notifications about errors on the channel. |
| Sender GLN | Enter the Global Location Number (GLN) of the sender. The given data is included in the outgoing EPCIS file (commissioning request). |
| Receiver GLN | Enter the GLN of the receiver. The given data is included in the outgoing EPCIS file (commissioning request). |
| Select environment | Select the environment:
|
| SFTP Username | For the SFTP connection, enter the username. |
| SFTP Password | For the SFTP connection, enter the password. |
| SOAP Username | For the SOAP connection, enter the username. |
| SOAP Password | For the SOAP connection, enter the password. |
Example:
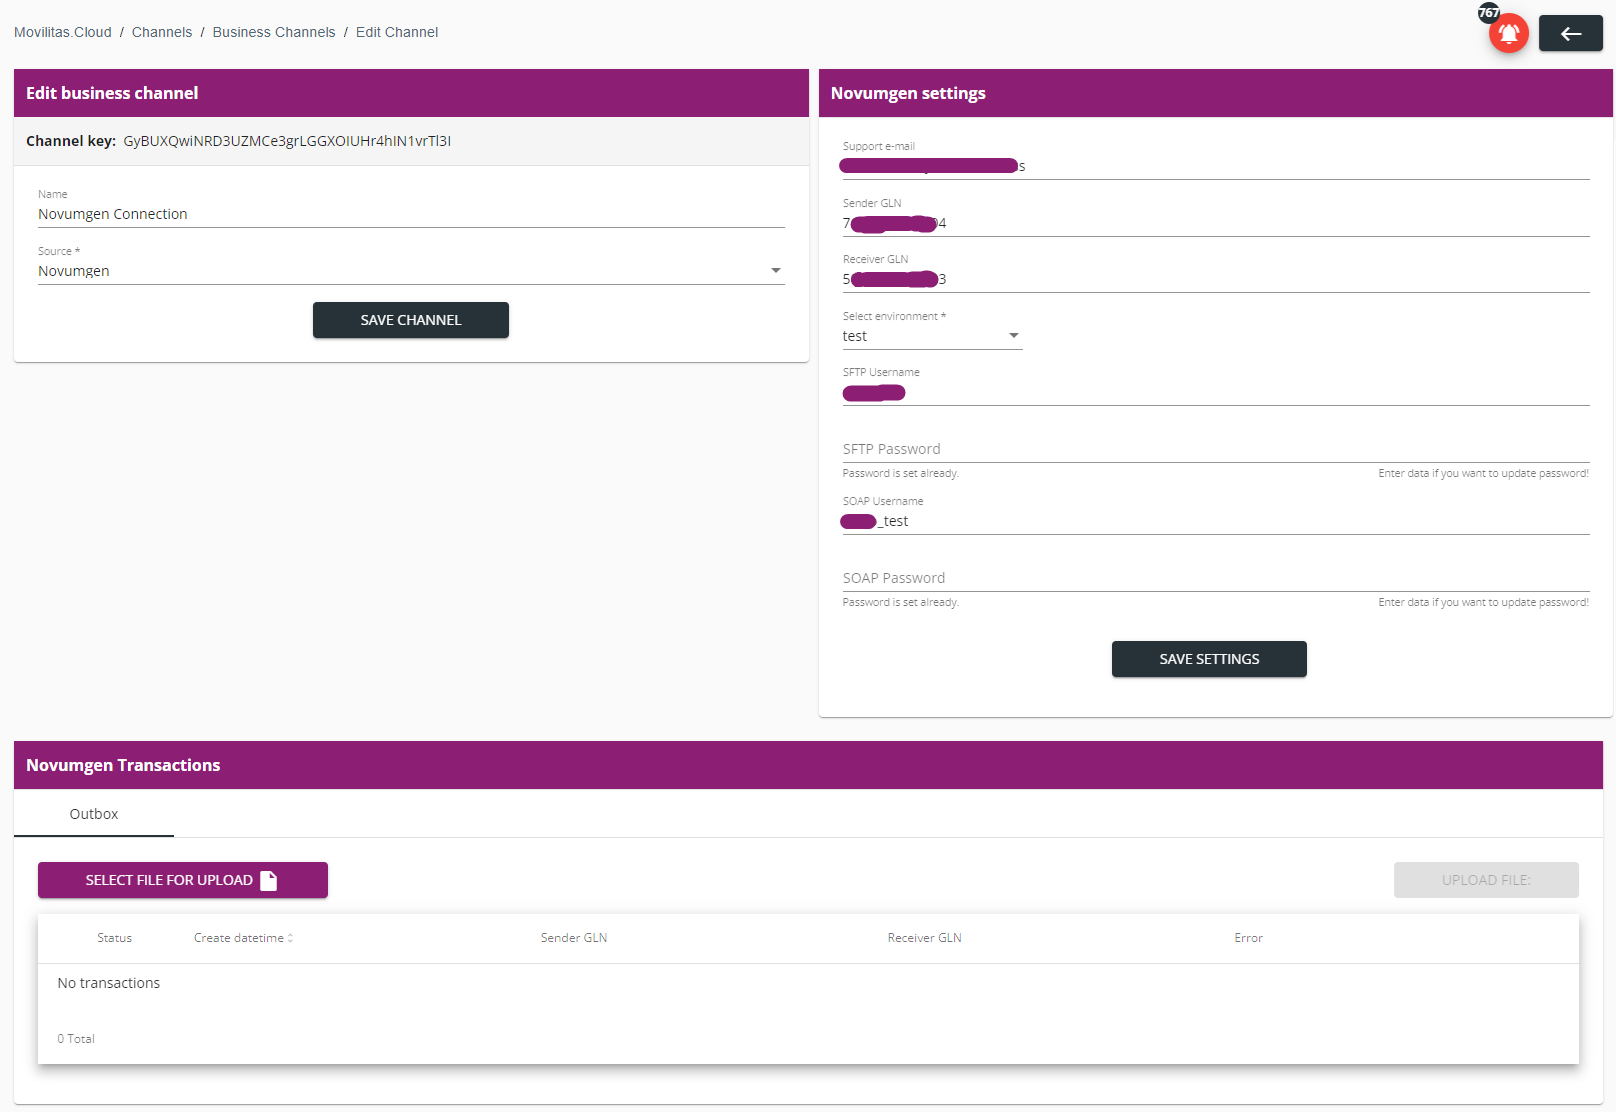
6. Click Save Settings.
7. (Optional) If needed, change the name of the channel and click Save Channel.
Next Steps
Configure the Serialized Manufacturing application with the Novumgen channel.
Back to the list of procedures
Monitoring Outgoing Transactions (Outbox)
You can monitor the status of the EPCIS file uploads to SFTP, detect any issue that occurred while uploading the files, and investigate the transaction details. You can download the file.
Note: Only commissioning requests are logged on the channel.
Procedure
1. Go to Movilitas.Cloud Console --> My tenants.
2. Select the tenant or click Open tenant next to it.
3. On the Tenant Dashboard, select the Channels tab. The application displays the list of channels assigned to the tenant.
4. To search for a Novumgen channel, use the search field and the filters:
- Enter the channel name in the search field.
- Select the status.
- Select Novumgen as the source.
- Select Business channel as the type.
5. To view the channel information, click on the channel name or the edit icon (Edit channel) next to the channel.
The application displays the Edit Channel page with the current channel settings and the Novumgen Transactions panel with the Outbox tab.
Example:
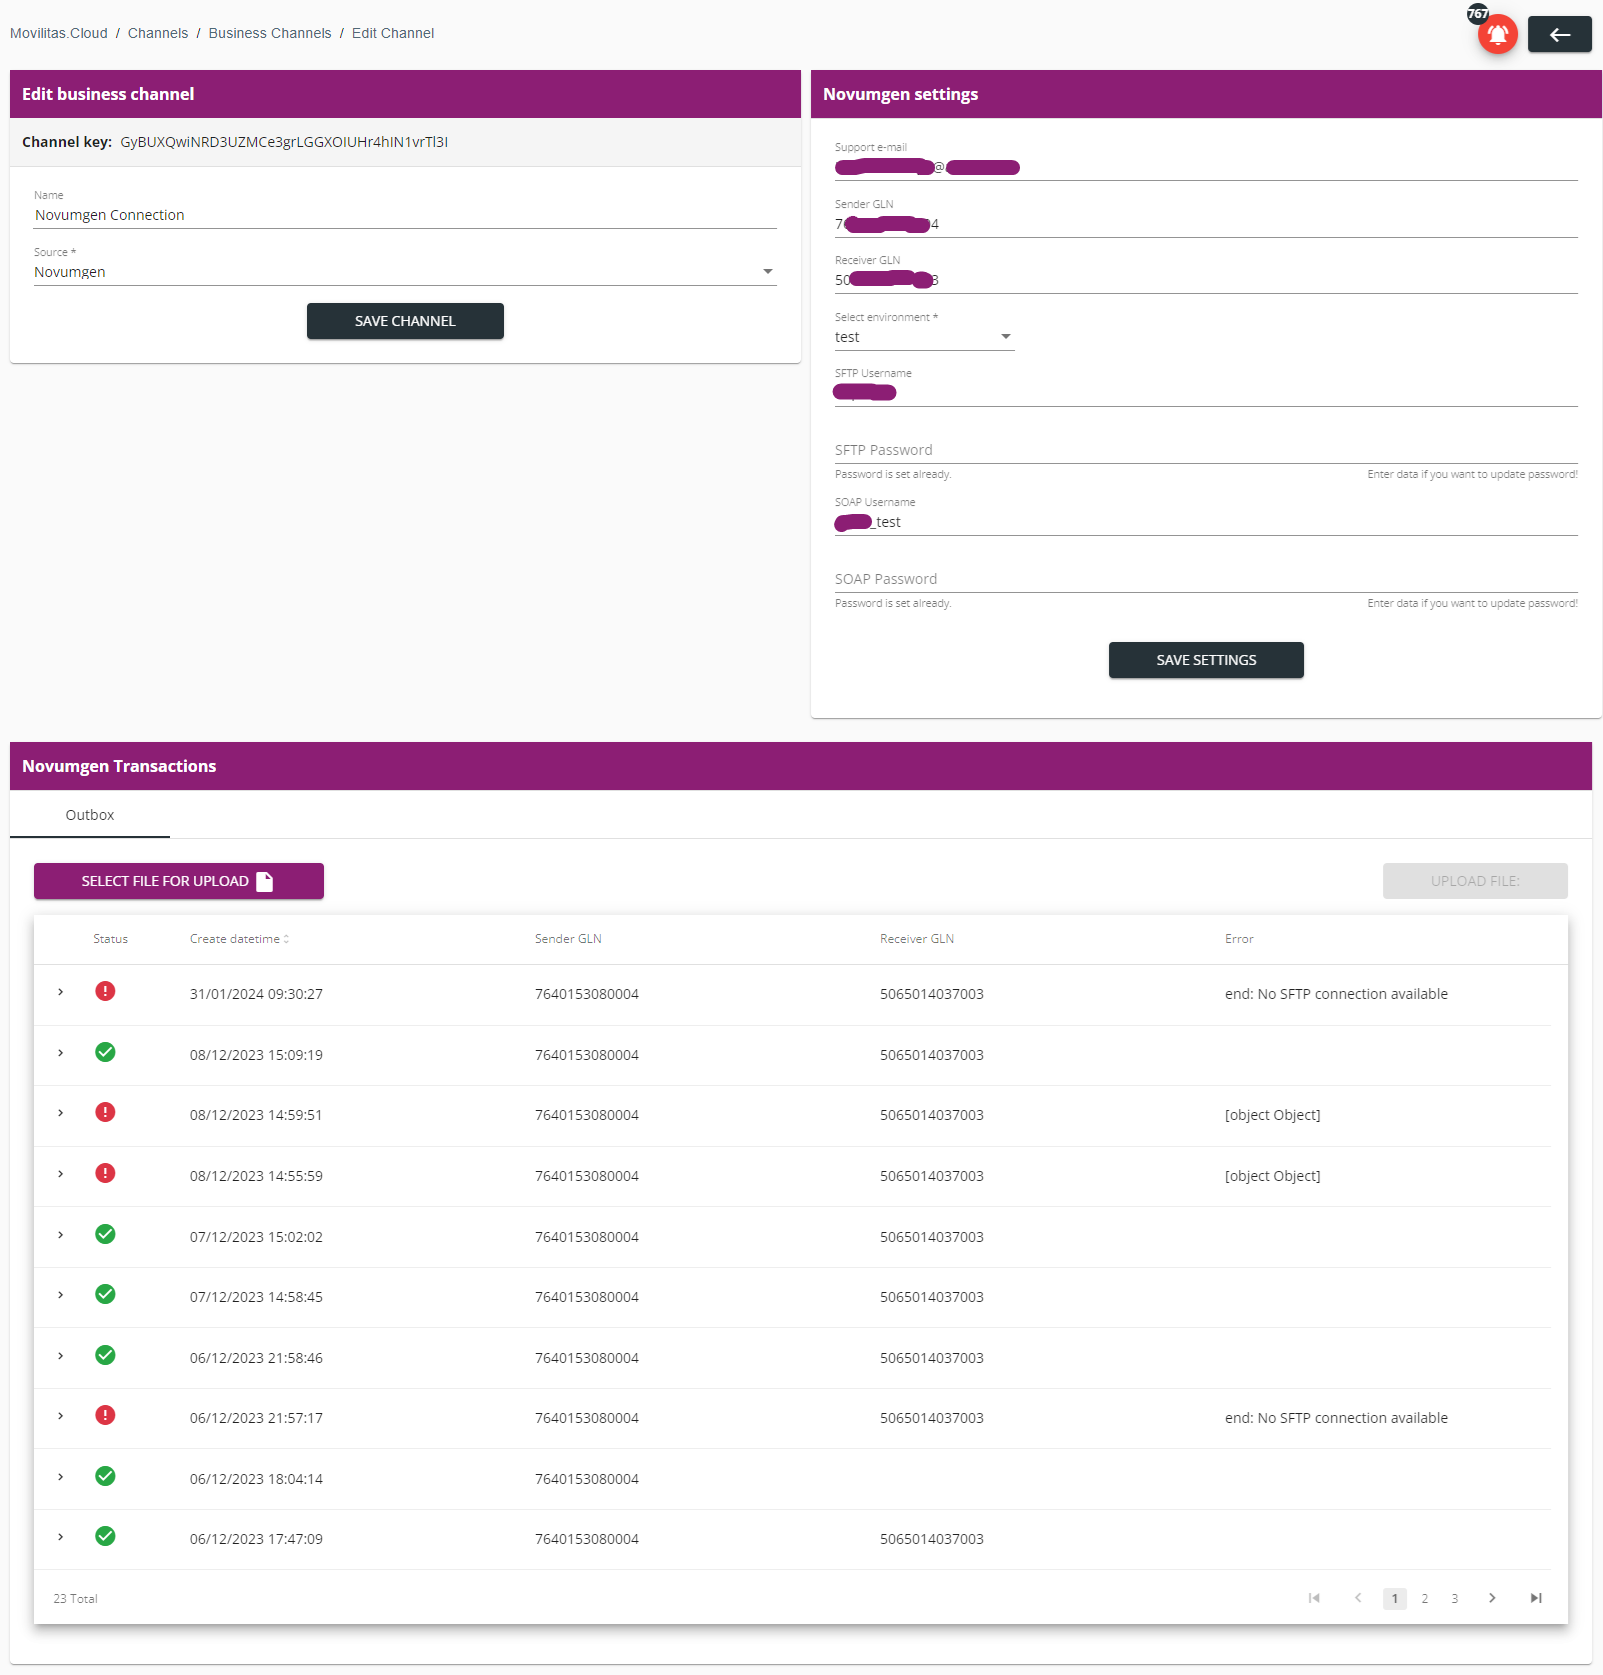
6. On the Novumgen Transactions panel, under the Outbox tab, find and verify the log.
The log can take one of the following statuses:
| Status | Description | Action |
|---|---|---|
| Green checkmark icon (Finished) | The message is sent to Novumgen successfully. | N/A |
| Red exclamation mark (Error) | An error occurred while sending the message to Novumgen. Possible root causes:
| Check the error message in the Error column. Make sure that Novumgen is available and the credentials are correctly given on the channel. |
7. Expand a log.
Example:

8. (Optional) Download the file by clicking Download. Save the file to your computer.
Next Steps
For failed transactions, investigate the issue and find the root cause. Once the issue is resolved, you can manually upload the file to Novumgen.
Back to the list of procedures
Uploading a File to Novumgen through SFTP (Outbox)
You can import an EPCIS file from your local computer to Movilitas.Cloud and then you can upload the file to Novumgen. Only EPCIS files are allowed and content validation is performed in the background.
In the normal case, Movilitas.Cloud automatically uploads the file to Novumgen. You need to manually upload a file because of an error, for example, the automatic upload of the file failed. Investigate the issue before uploading a file manually.
Procedure
1. Go to Movilitas.Cloud Console --> My tenants.
2. Select the tenant or click Open tenant next to it.
3. On the Tenant Dashboard, select the Channels tab. The application displays the list of channels assigned to the tenant.
4. To search for a Novumgen channel, use the search field and the filters:
- Enter the channel name in the search field.
- Select the status.
- Select Novumgen as the source.
- Select Business channel as the type.
5. To view the channel information, click on the channel name or the edit icon (Edit channel) next to the channel.
The application displays the Edit Channel page with the current channel settings and the Novumgen Transactions panel with the Outbox tab.
6. On the Novumgen Transactions panel, under the Outbox tab, click Select File for Upload.

7. Select the file you want to upload. After selecting the file, the Upload File button becomes active.
Example:

8. Click Upload File: <FILENAME>. Movilitas.Cloud puts the file in the applicable folder in Novumgen and creates a log on the channel.
If the transaction fails, you need to investigate the issue again and understand the root cause. If the problem can be resolved by repeating the upload operation, reupload the file.
Back to the list of procedures