You can use the Serialized Logistics V2 API to integrate the third-party systems with the Serialized Logistics application.
The Serialized Logistics V2 API uses the Representational State Transfer (REST) standard to interact with other systems.
The Serialized Logistics V2 API is an extension of the Serialized Logistics application of Movilitas.Cloud and enables you to send requests from external systems to the application.
This article describes how to mark an EPCIS file from a supplier as Received in Movilitas.Cloud by using the Serialized Logistics V2 API. The action indicates that the items from the EPCIS file have been physically received.
API Tool to Use
In this document, we provide examples by using the cURL command-line tool. To send the API request, you can find a lot of user-friendly REST API tools on the Internet, for example, Postman.
Before You Begin
Before you start sending any messages:
1. You must enable the Serialized Logistics application in the Admin UI.
2. You must create an API key and secret.
3. You must create a shopfloor channel with Serialized Logistics V2 API source. You will need the channel key for your requests.
4. You must configure the Serialized Logistics application.
5. You must have the authentication token to send requests over API. Select one of the following ways:
- Apply a dynamic token. Send an authentication request over the Authentication API. For more information about the Authentication API, open the Tenant Dashboard in Movilitas.Cloud, select API keys, and choose Authentication API Documentation. Also, see Authentication Request.
- Apply a static token. Generate a static token for your previously created API key.
For more information, see Configuring the Movilitas.Cloud APIs.
Procedure
1. Use the POST method and the following URL:
https://api.movilitas.cloud/v1/serialized_logistics/v2/api/suppliers/mark_epcis_as_received
2. For the header, define the content type (JSON), the authentication token, and the channel key.
The token can be given in one of the following ways:
- As x-access-token header.
- As Authorization header by using the Bearer schema.
Header Option 1:
| Key | Action |
|---|---|
| Content-Type | Apply JSON format for the content. Use the value application/json. |
| x-access-token | Provide the authentication token. |
| x-channel-key | Provide the channel key of your Serialized Logistics V2 API channel. |
Header Option 2:
| Key | Action |
|---|---|
| Content-Type | Apply JSON format for the content. Use the value application/json. |
| Authorization | Provide the authentication token as Bearer <token>. |
| x-channel-key | Provide the channel key of your Serialized Logistics V2 API channel. |
3. In the body of the request, define the parameters and their values based on the table below.
| Field | Required or Optional? | Type | Description |
|---|---|---|---|
| epcis_object_id | Required | String | The identifier of the EPCIS file upload. You can obtain the ID by sending one of the following requests over API: |
| supplier_tag | Required | String | The supplier tag that identifies your supplier. Note: Make sure that you have registered the supplier in the Serialized Logistics application --> Site management --> Suppliers tab and apply the value given in the Supplier tag field. |
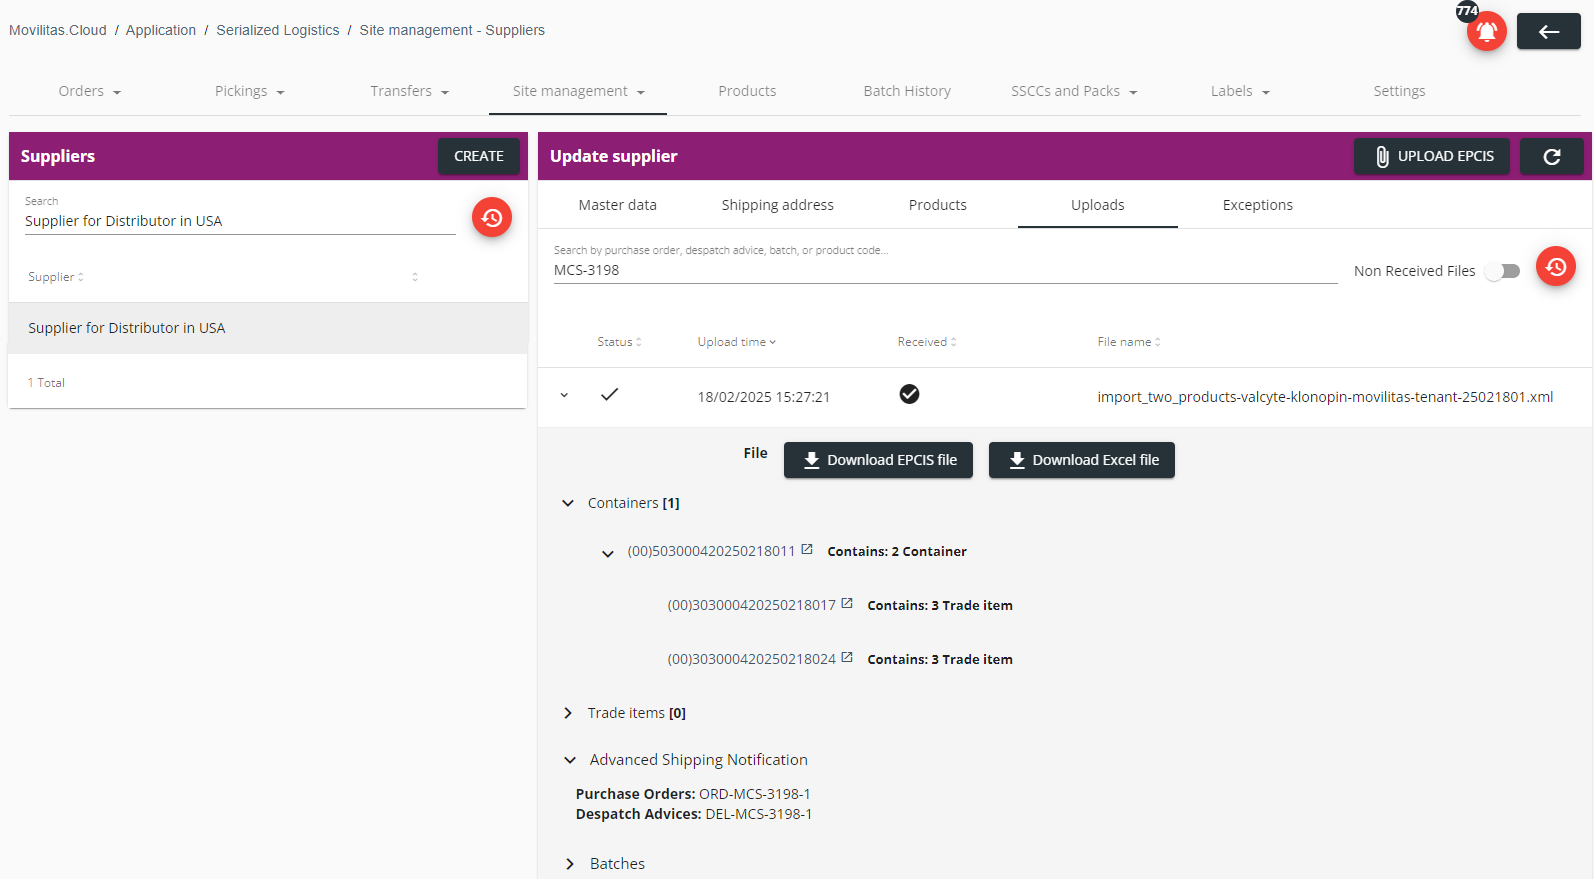
4. Send the request. The EPCIS file from the supplier is marked as Received that you can check under the Serialized Logistics application --> Site management --> Suppliers --> Uploads tab.
The application sets the in possession flag to “yes” for the items from the EPCIS file, indicating that the items have been physically received.
Sample cURL Request
curl -X POST \
  https://api.movilitas.cloud/v1/serialized_logistics/v2/api/suppliers/mark_epcis_as_received \
  -H 'Content-Type: application/json' \
  -H 'x-access-token: eyJhbGciOiJIUzI1NiIsInR5cCI6IkpXVCJ9.eyJrZXkiOiJzX2FqazQyS2RLQWhHciE3TUZtY1Q2UzhTQ3NDQ2hzc2RoTXRFUlNBIUNwUDhlZDkzU2htQ0hoaHIyTmg3Y0dBIiwiX2lkIjoiNWQyNzA4ZDc3NDQ1OTcxYjI5MmY4ZDI3IiwiaWF0IjoxNTY0MDU5ODc2LCJleHAiOjE1NjQxNDYyNzZ9.TBMv71CaxCNtE1opQMk0f1ncfbnZ0Cwnu7MWkTzkQqA' \
  -H 'x-channel-key: Ky1SpfEXmjj05fW3USBFD3pgoEi9AQ29Atsnj4Zy' \
  -d '{
    "epcis_object_id": "67b498c9a6eaab2db539f999",
    "supplier_tag": "supplier-for-distributor-usa"
}'
Sample Response (Success 200)
{
    "success": true,
    "message": "Successfully marked EPCIS as received"
}
Admin UI Example
Errors and Resolution
This section lists some of the most general error messages or error types when sending the request.
| Error Message or Error Type | Error Code | Description |
|---|---|---|
| No token provided | ERR0001 | No authentication token is provided. Ensure that you add the authentication token to the header of the request. |
| Failed to authenticate token | ERR0000 | Failed to authenticate the provided token. Double-check if your token has expired or has been revoked. Obtain a valid token by generating a static one or by getting a dynamic one through Authentication API. |
| Channel ID is missing or it needs to be in correct format | - | The channel key of your Serialized Logistics V2 API channel is not specified in the request. To get the channel key, go to Tenant Dashboard --> Channels in the Admin UI, open your Serialized Logistics V2 API channel, and find the channel key on the top of the Edit shopfloor channel panel. |
| Request body could not be parsed | - | The syntax of the request body is not correct, for example, a comma is missing at the end of a field. Make sure that the request body is defined in the correct way and that you use JSON format. |
| Validation error | - | The given data is invalid. It does not follow the required data type or pattern. The response includes details about the specific issue. Follow the explanation in the response and correct your data. |
| Supplier not found | - | The system cannot identify the supplier based on the given supplier tag. The supplier is not registered or the supplier is registered but lacks the supplier tag. Go to the Serialized Logistics application --> Site management --> Suppliers tab in the Admin UI and complete the supplier registration before sending the request over API. Make sure that you specify a supplier tag and that you use this tag in your request over API. |
| EPCIS not found with specified Object Id | - | An EPCIS file upload does not exist with the specified object ID. Make sure that you give the correct object ID. |
| EPCIS does not belong to the supplier with the specified Object Id | - | An EPCIS file with the given object ID does not belong to the specified supplier. The EPCIS upload exists but it belongs to another supplier. Make sure that the given object ID and supplier tag are consistent and belong to each other. |