
The Manufactuer V2 API channel is an extension of the Serialized Manufacturing application. The Manufacturer V2 API endpoints are used for product management, batch management, serial management, SSCC management, label order management, and aggregation/disaggregation activities.
Next to the Manufacturer V2 API, you can configure the webhook.
- Webhook makes it possible to send updates to an external web application.
- Give the endpoint URL of the subscribing system and optionally configure the security aspects.
- When a label (printing) order is repacked, Movilitas.Cloud sends the order ID and the number of repacked items to that system.
- To verify the webhook settings, you can manually execute a webhook.
- A webhook log is also available to verify the success of the webhook and the data sent to the external system.
List of Procedures
For more information on the general channel actions, see Managing Channels for a Tenant (Overview).
Configuring a Manufacturer V2 API Channel
Procedure
1. Go to Movilitas.Cloud Console --> My tenants.
2. Select the tenant or click Open tenant next to it.
3. On the Tenant Dashboard, select the Channels tab. The application displays the list of channels assigned to the tenant.

4. Click the + icon (Create channel). The application displays the Create channel dialog.
5. Select Shopfloor channel as the type and click Create. The application displays the Create Channel page with an empty form to give the parameters of the channel.
6. Enter a name for the channel and select Manufacturer V2 API as the source.
7. Click Create Channel.
- The application informs you about the additional costs. After confirming the creation, the application displays the Edit Channel page.
- The channel key is also generated that you will need when sending the API requests to the Movilitas.Cloud application. You can find and copy the channel key at the top of the Edit shopfloor channel panel.
- Optionally, you can modify the name of the channel at any time.
Example:
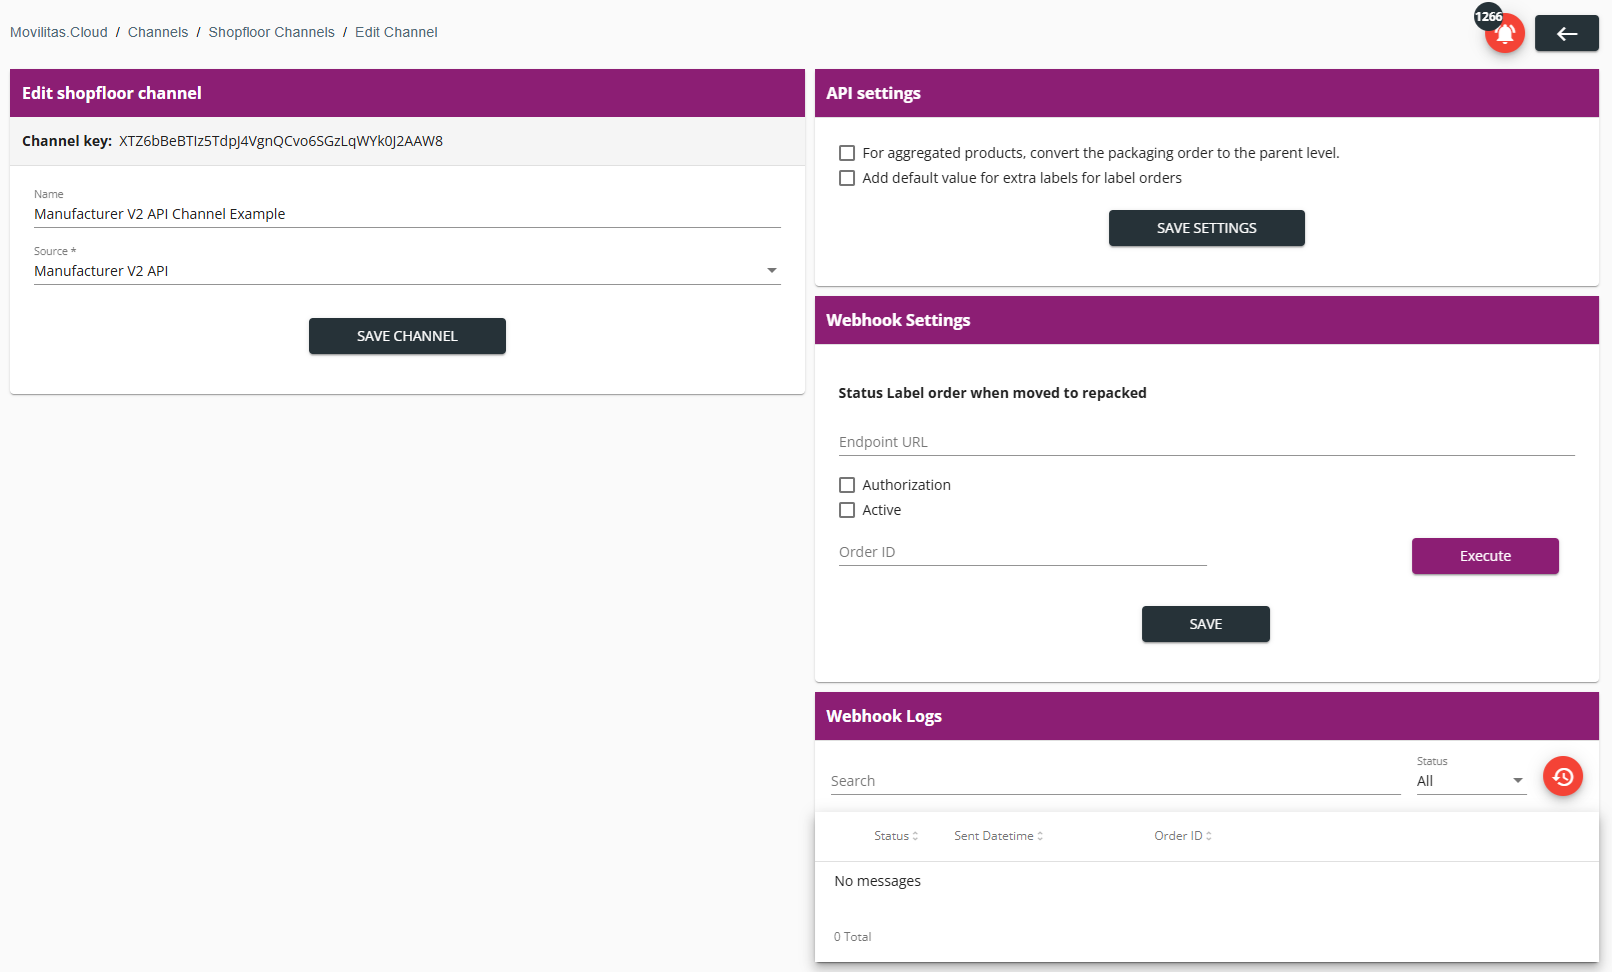
8. (Optional) If you want to create packaging orders for aggregated products while you specify the child product in the API request, select the For aggregated products, convert the packaging order to the parent level. checkbox.
If the checkbox is selected, the logic determines the parent product based on the product aggregation settings in the Serialized Manufacturing application. For more information, see Managing Aggregations in Managing Products.
9. (Optional) If you want to execute label (printing) orders in the Serialized Manufacturing application, you can set a default value for the extra labels to be printed.
a. Select the Add default value for extra labels for label orders checkbox. The application displays the Extra label amount and Extra label type fields.
Example:
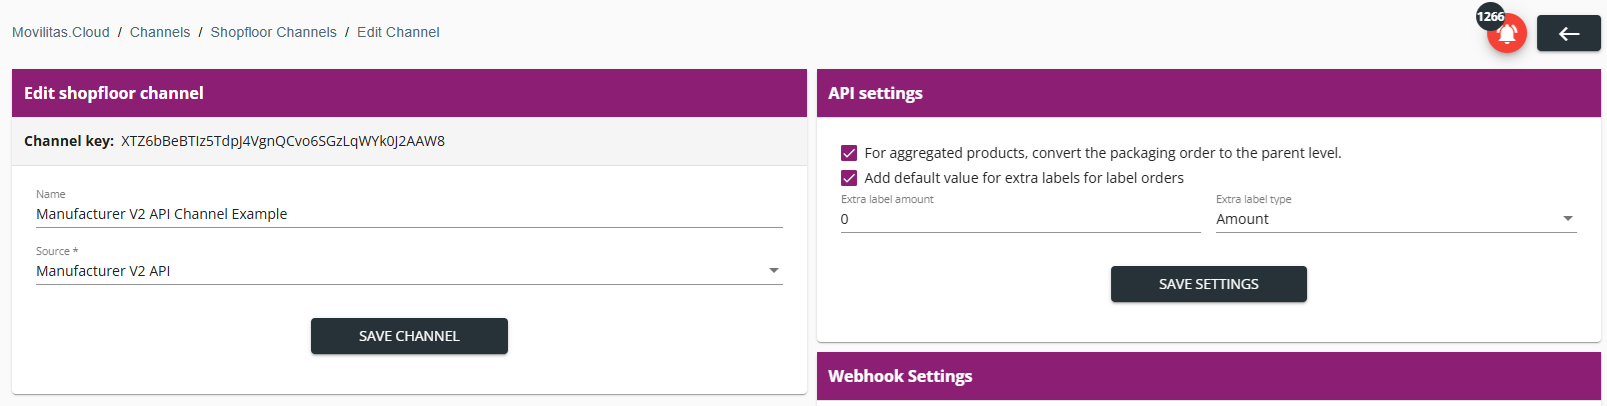
b. Specify the extra quantity in the Extra label amount field and select the extra label type in the Extra label type drop-down:
- Amount.
- Percentage.
The setting comes into effect if the API request that creates the label order does not specify extra labels. If the default value for extra labels is not set and the API request that creates the label order does not specify extra labels either, there are no extra labels for the label order.
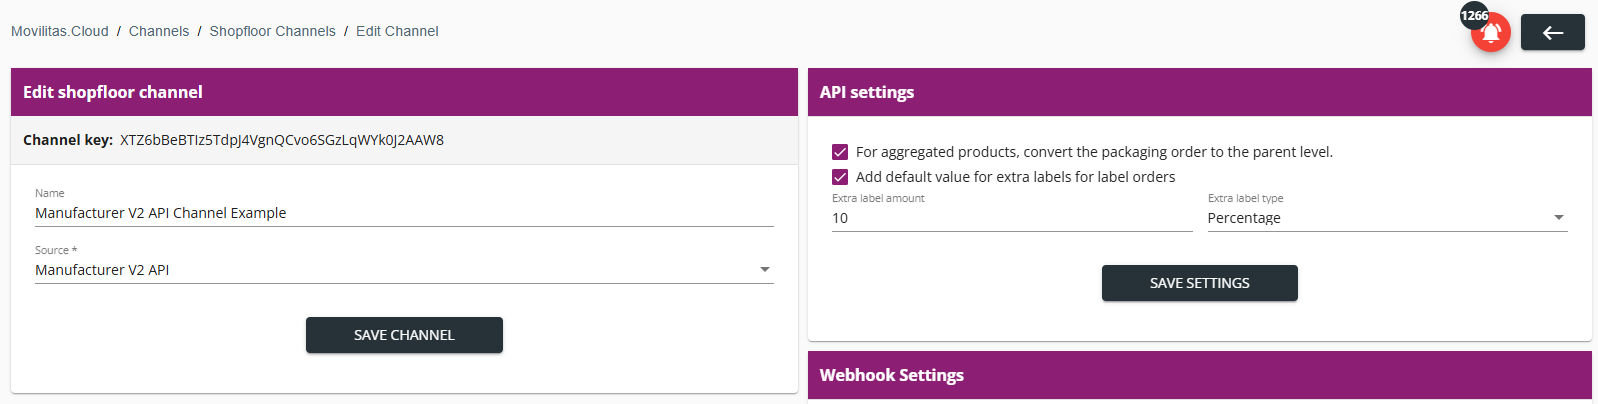
10. Click Save Settings.
Example:
Next Steps
To communicate over the Manufacturer V2 API:
- Configure the Serialized Manufacturing application.
- Obtain an authentication token after creating the API key and secret. You must include the token in the header of the API requests.
- Copy and keep the channel key of the Manufacturer V2 API channel for the API communication. You must include the channel key in the header of the API requests.
For more information, see Before You Send Any API Request and Manufacturer V2 API.
Back to the list of procedures
Configuring Webhook
Webhook enables Movilitas.Cloud to send the label order ID and the number of repacked items to an external system when the label order goes to Repacked status. Provide the endpoint URL of the subscribing system, configure security, and activate the webhook.
Procedure
1. Go to Movilitas.Cloud Console --> My tenants.
2. Select the tenant or click Open tenant next to it.
3. On the Tenant Dashboard, select the Channels tab. The application displays the list of channels assigned to the tenant.
4. To search for a Manufacturer V2 API channel, use the search field and the filters:
- Enter the channel name in the search field.
- Select the status.
- Select Manufacturer V2 API as the source.
- Select Shopfloor channel as the type.
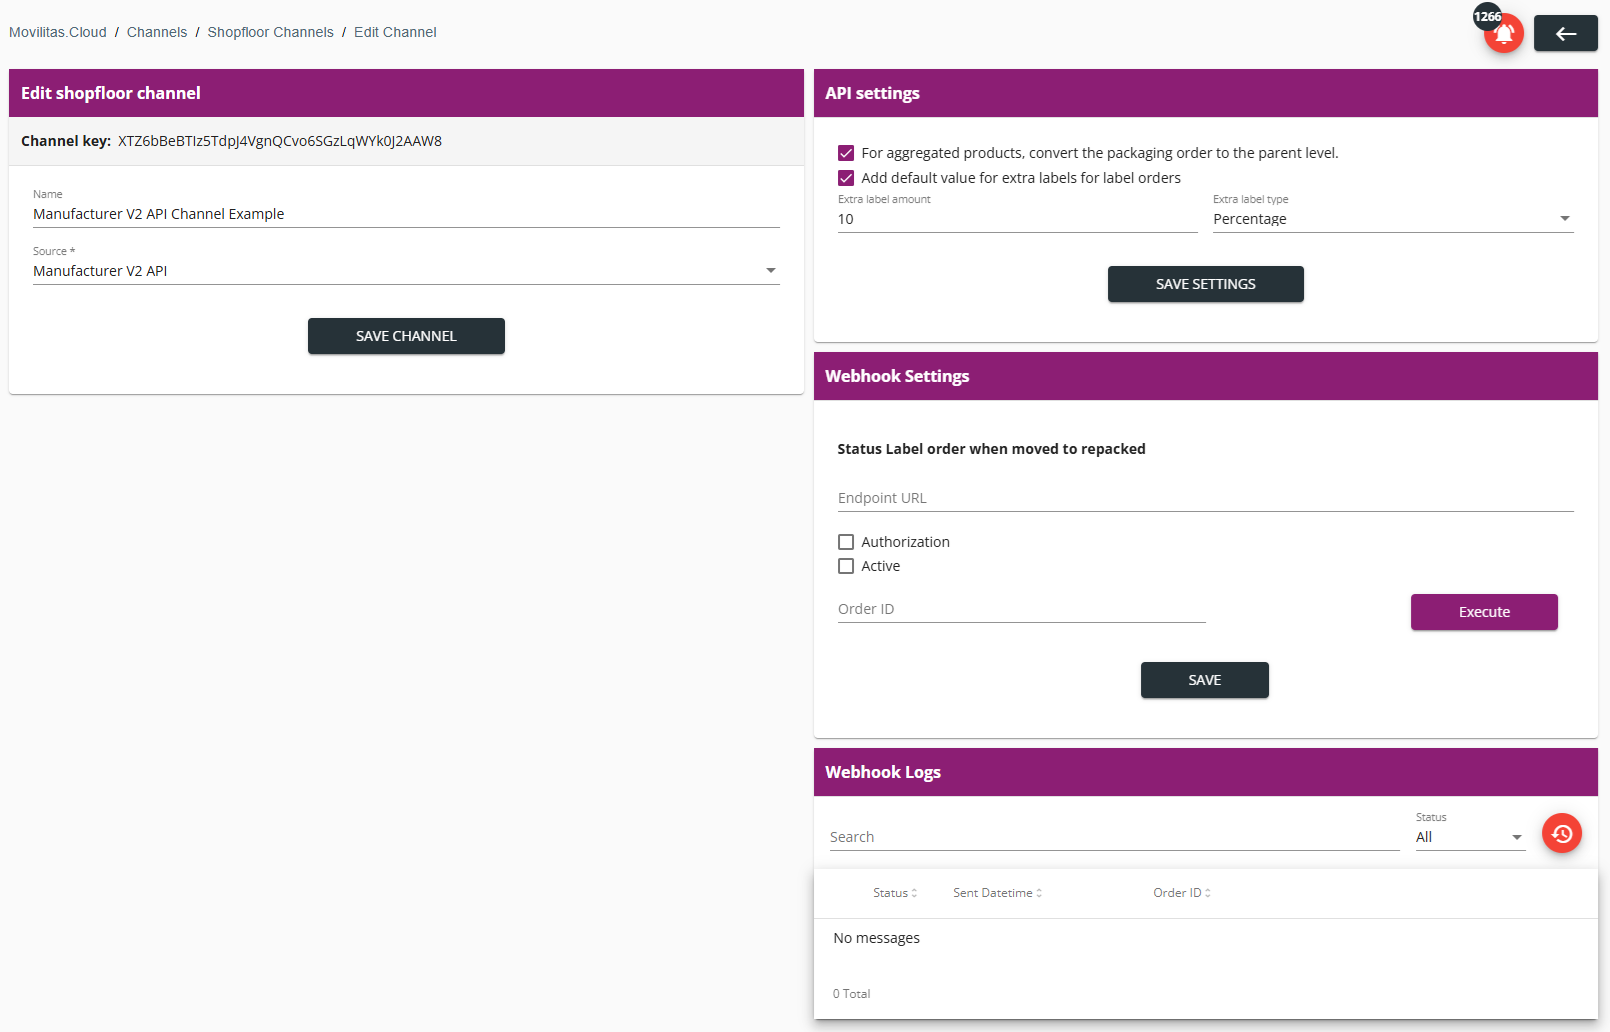
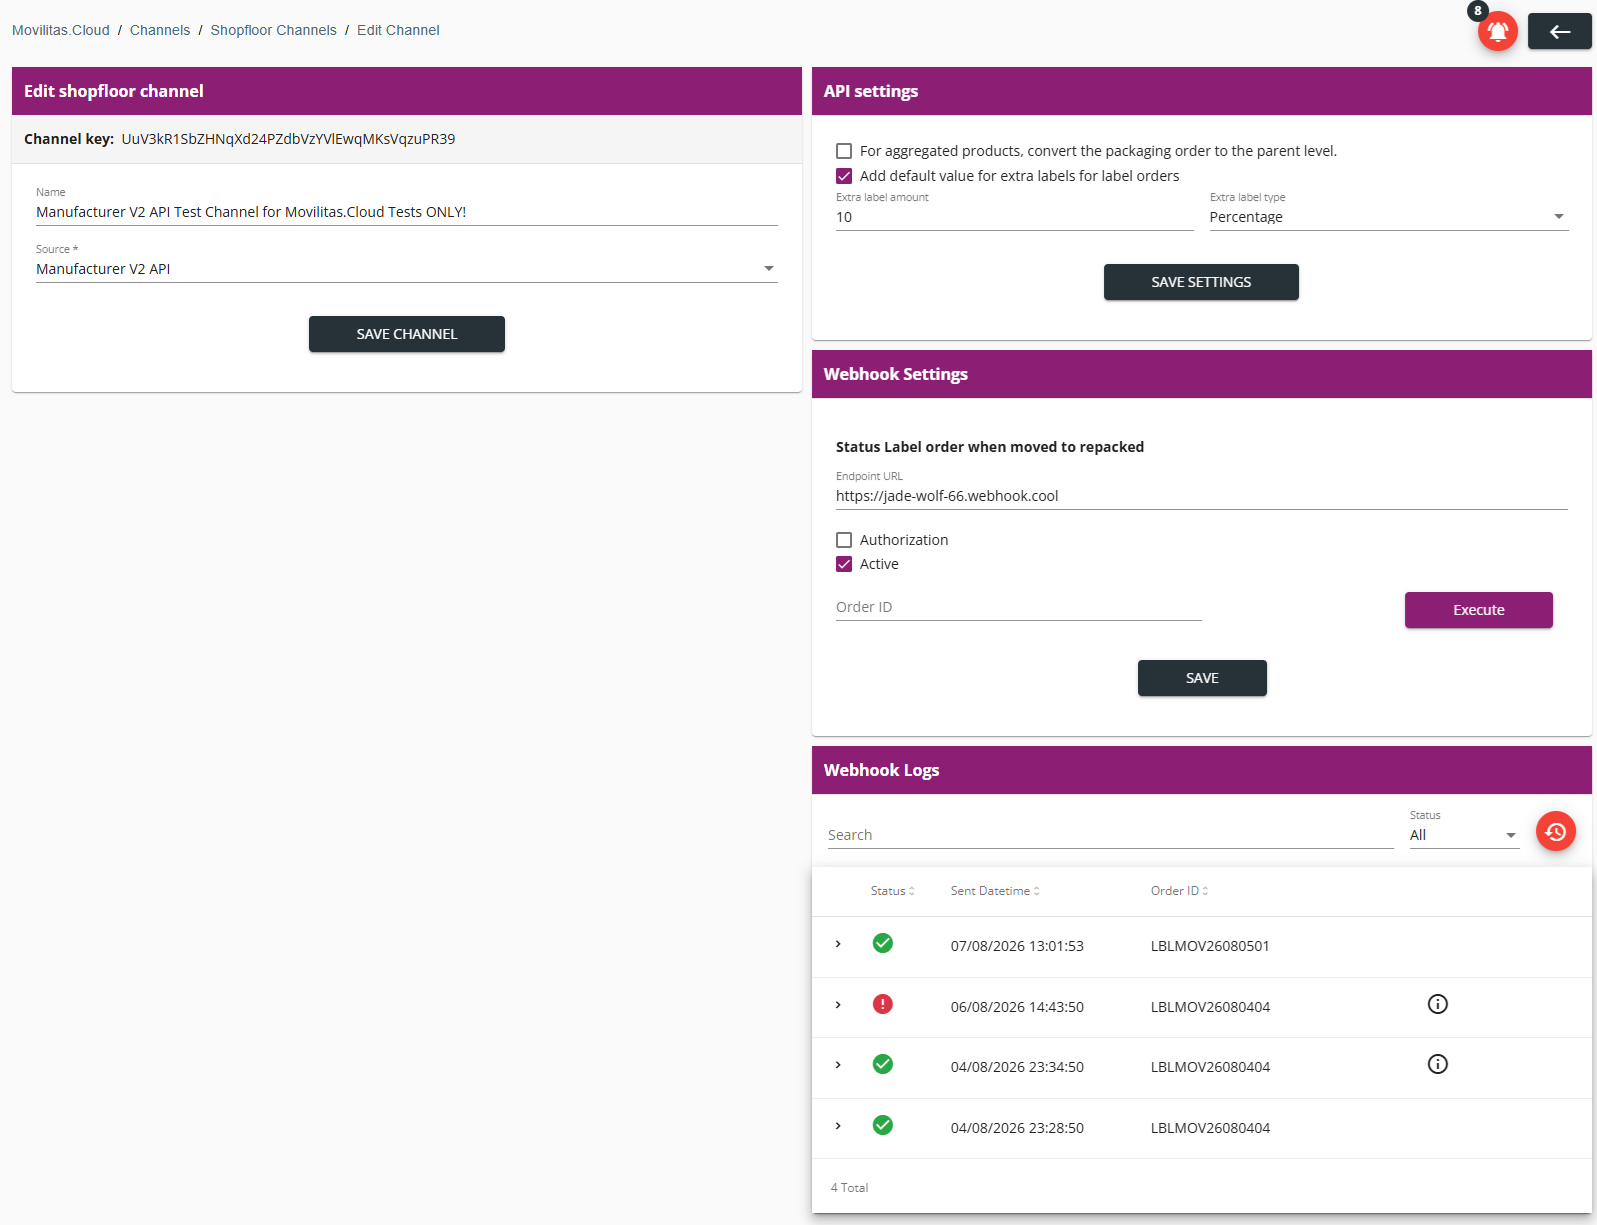
5. To view the channel information, click on the channel name or the edit icon (Edit channel) next to the channel. The application displays the Manufacturer V2 API channel details, the API settings panel, the Webhook Settings panel, and the Webhook Logs.
The following example illustrates the case when we are configuring webhook from scratch:
6. Provide the endpoint URL to receive the label order ID and the number of repacked items when a label order goes to Repacked status.
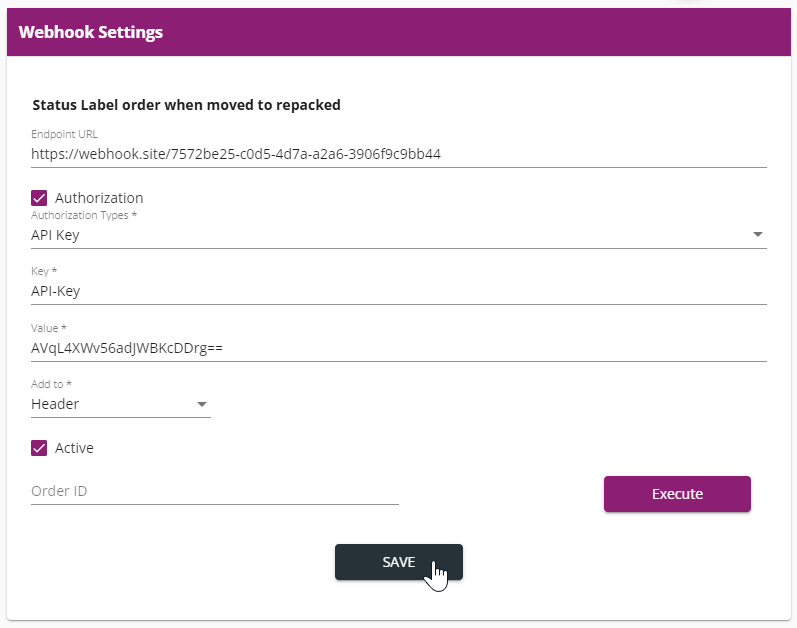
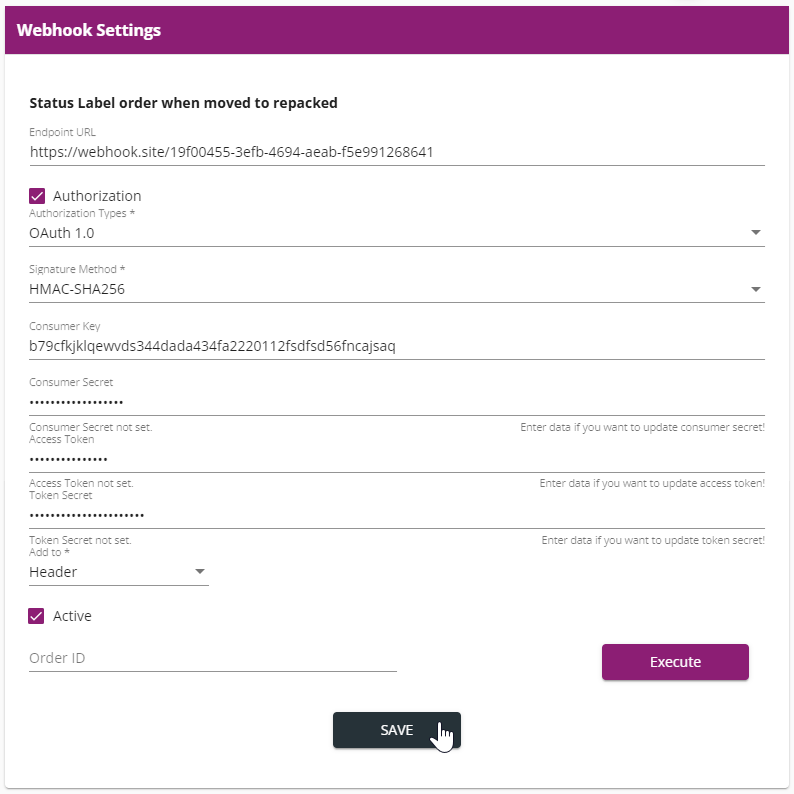
7. If authorization is required to send messages to the specified endpoint, select the Authorization checkbox and configure the security settings. The required fields are marked with an asterisk (*) in the form.
| Field | Description |
|---|---|
| Authorization Types | Select the type of authorization.
The form dynamically changes depending on the selected type. |
| API Key | |
| Key | Enter the key as expected by the subscribing system. For example, "API-Key". |
| Value | Enter the API key value that was generated in an external system, for example, Dynamics 365. |
| Add to | Specify where to add the credentials in the request. The supported value is Header. |
| OAuth 1.0 | |
| Signature Method | Select the signature method. The supported value is HMAC-SHA256. |
| Consumer Key | Enter the consumer key as expected by the external system. |
| Consumer Secret | Enter the consumer secret related to the consumer key. |
| Access Token | Enter the access token. |
| Token Secret | Enter the token secret. |
| Add to | Specify where to add the credentials in the request. The supported value is Header. |
8. Activate webhook by selecting the Active checkbox.
The following example illustrates the case when API Key authorization is set for the webhook. Webhook is activated:
The following example illustrates the case when OAuth 1.0 authorization is set for the webhook. Webhook is activated:
9. Click Save.
The webhook is configured. If a label order goes to Repacked status in the Serialized Manufacturing application, Movilitas.Cloud sends the order ID and the number of repacked items to the configured endpoint.
Next Steps
Test the webhook settings manually by providing the order ID of an existing order.
Back to the list of procedures
Testing Webhook
To test the webhook settings, you can manually execute a webhook by providing the order ID of a repacked label (printing) order.
Before You Begin
Make sure that the label order exists in the Serialized Manufacturing application and the order is in Repacked status.
Procedure
1. Log in to the external system where you expect the update through the webhook.
2. Go to Movilitas.Cloud Console --> My tenants.
3. Select the tenant or click Open tenant next to it.
4. On the Tenant Dashboard, select the Channels tab. The application displays the list of channels assigned to the tenant.
5. To search for a Manufacturer V2 API channel, use the search field and the filters:
- Enter the channel name in the search field.
- Select the status.
- Select Manufacturer V2 API as the source.
- Select Shopfloor channel as the type.
6. To view the channel information, click on the channel name or the edit icon (Edit channel) next to the channel. The application displays the Manufacturer V2 API channel details, the API settings panel, the Webhook Settings panel, and the Webhook Logs.
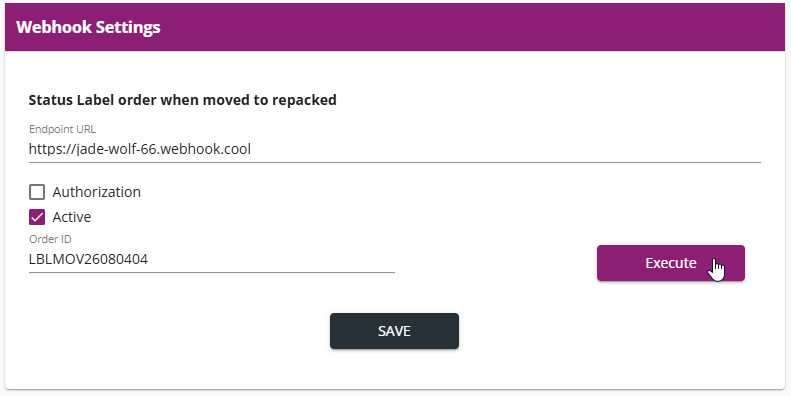
7. On the Webhook Settings panel, enter the order ID in the Order ID field and click Execute.
Movilitas.Cloud sends the order data to the external system through a webhook.
Example:
8. Verify the order data in the webhook logs and in the external system.
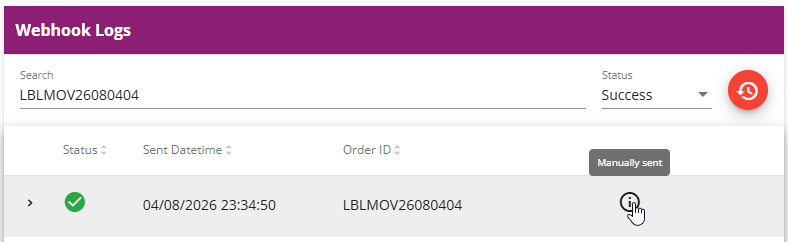
If the log belonging to the order is in successful status (green checkmark icon) and you can see the order data in the external system, your webhook settings are correct. Next to the log, an indicator (i) icon is displayed to show that the webhook was manually executed.
The following example illustrates the case when the webhook was successful, and the webhook settings are correct:
Result:
When a label order goes to Repacked status in the Serialized Manufacturing application, Movilitas.Cloud automatically sends the order ID and the number of repacked items to the subscribed system through a webhook without human intervention.
Back to the list of procedures
Viewing Webhook Logs
If the label (printing) order is repacked, the label order ID and the number of repacked items are sent through a webhook, and a log is created. The logs are collected in a separate table. For each log, you can see the status of the message, the date and time when the message was sent, and the order ID. An indicator (i) icon next to the log helps you identify the manually executed webhooks (manually sent messages).
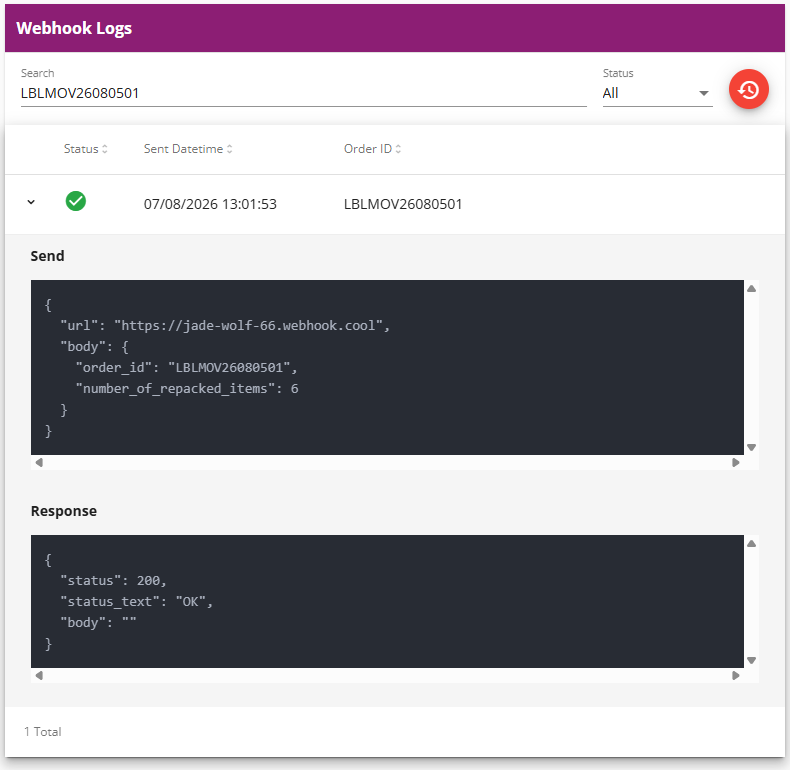
You can search for a log by entering the order ID and filtering on the status (success or failed). You can expand the log to verify the data sent in the webhook and the response from the external system (if any).
Procedure
1. Go to Movilitas.Cloud Console --> My tenants.
2. Select the tenant or click Open tenant next to it.
3. On the Tenant Dashboard, select the Channels tab. The application displays the list of channels assigned to the tenant.
4. To search for a Manufacturer V2 API channel, use the search field and the filters:
- Enter the channel name in the search field.
- Select the status.
- Select Manufacturer V2 API as the source.
- Select Shopfloor channel as the type.
5. To view the channel information, click on the channel name or the edit icon (Edit channel) next to the channel. The application displays the Manufacturer V2 API channel details, the API settings panel, the Webhook Settings panel, and the Webhook Logs.
Example:
6. On the Webhook Logs panel, investigate the logs.
- If you see a green checkmark icon next to the log, sending the webhook message was successful.
- If you see a red exclamation mark icon next to the log, sending the webhook message failed.
- If you see an (i) indicator icon next to the log, the webhook message was manually sent to the endpoint URL.
7. Search for a log by entering the order ID in the search field and selecting the status of the log. The logs are filtered based on the search criteria.
8. To view the order details sent through the webhook, expand the log by clicking > (Expand).
In the following example, we are searching for the log with order ID "LBLMOV26080501". The message was sent automatically (no indicator icon). The log is expanded for the details:
- Endpoint URL.
- Order ID.
- Number of repacked items.
Back to the list of procedures
