
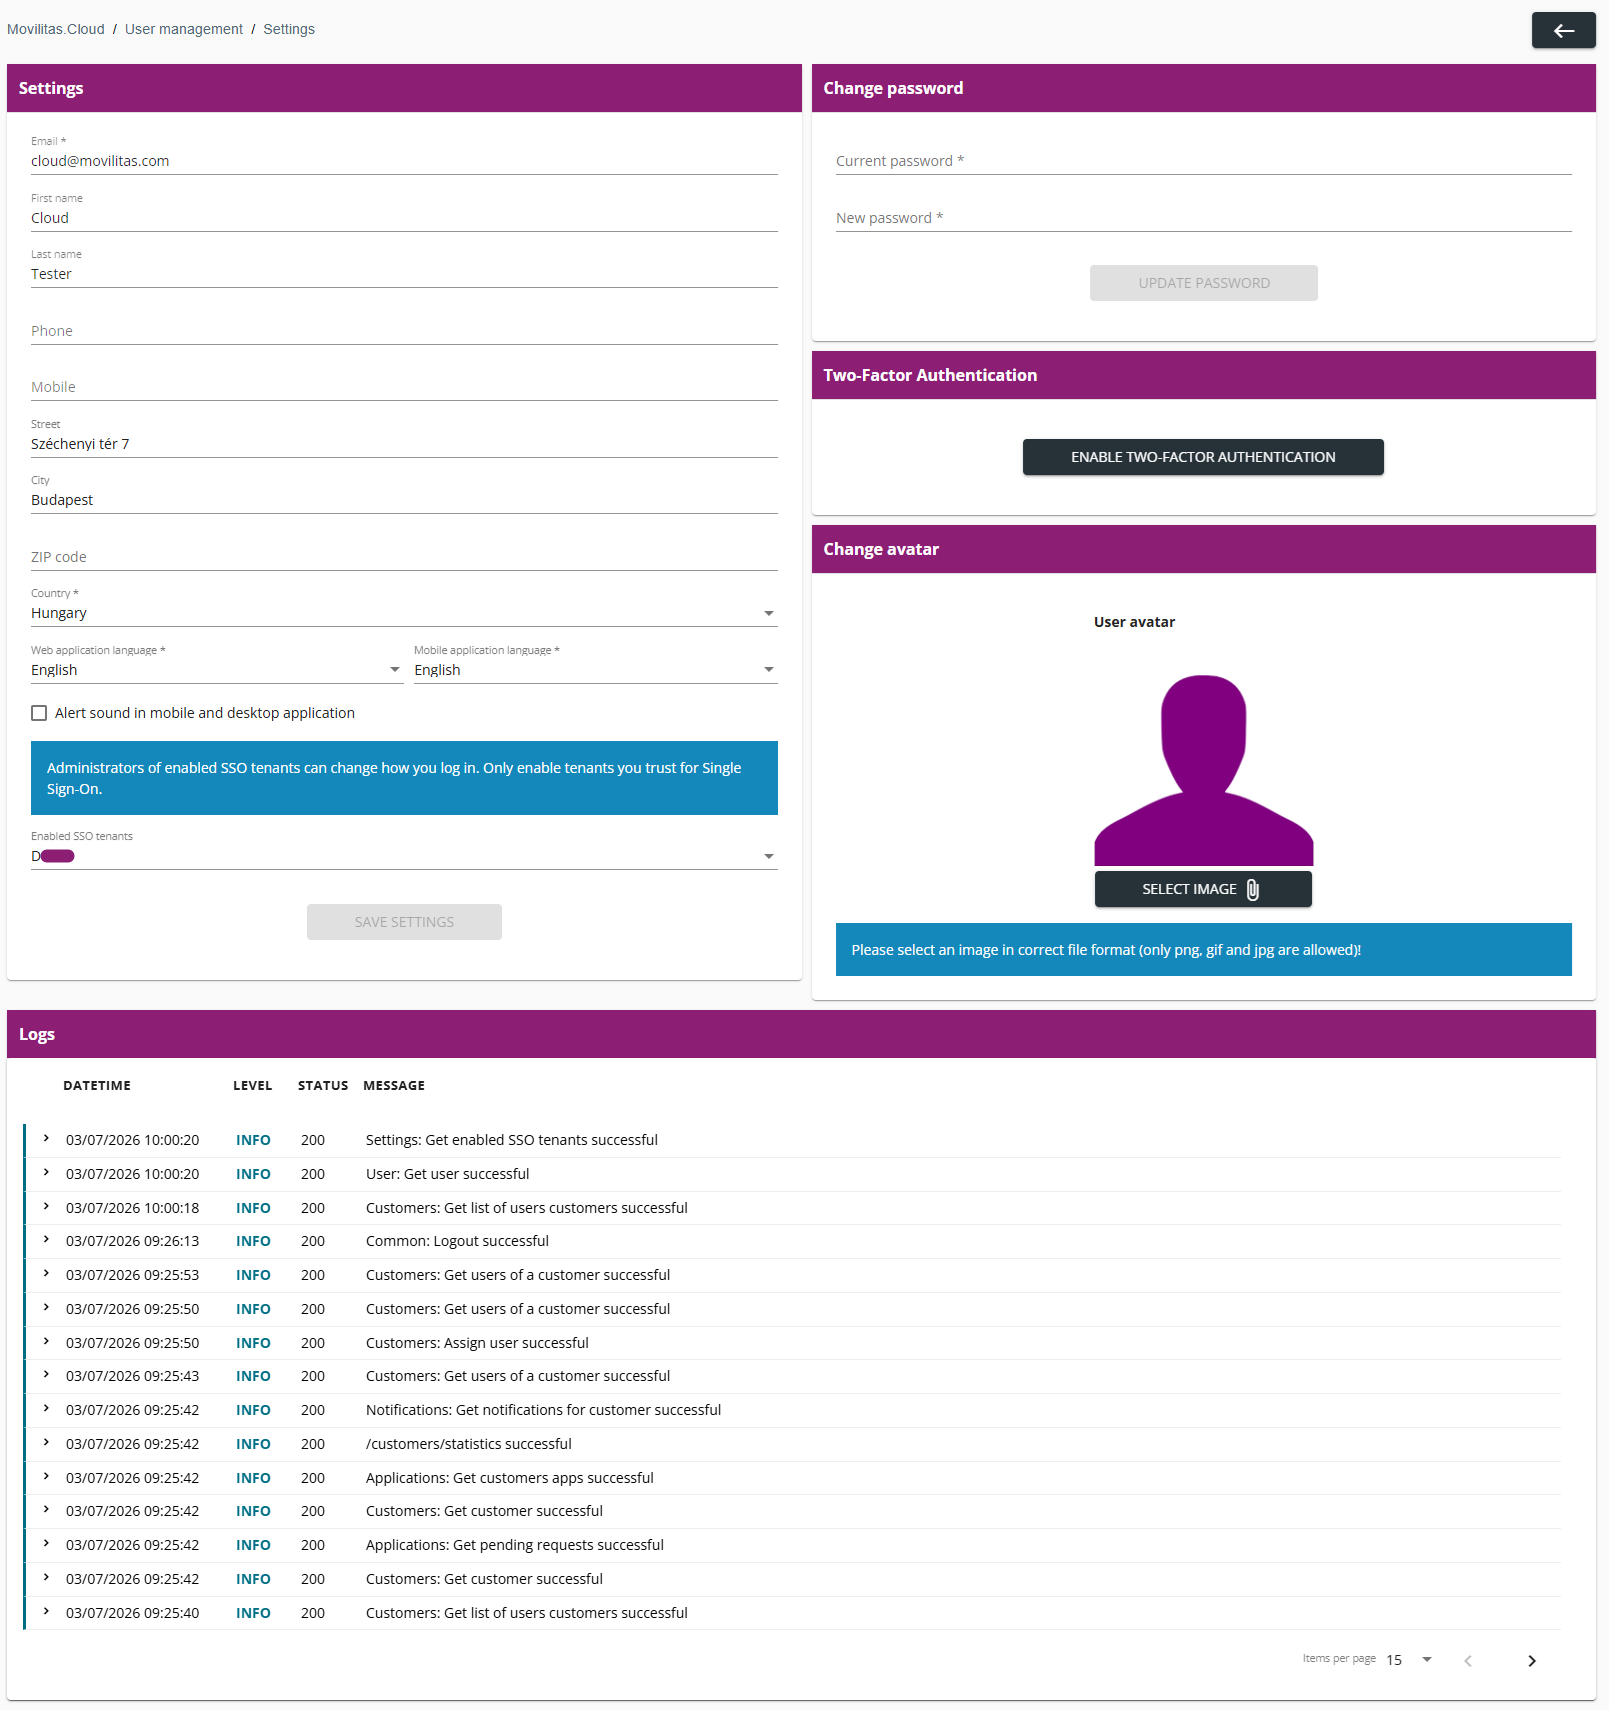
You can change the user settings:
- Personal data.
- Preferred language.
- Alert sound in mobile and desktop application.
- Enabled SSO tenants - Applicable if you are added to at least one tenant where SSO is set up.
- Changing password - Only non-SSO users.
- Activating or deactivating two-factor authentication - Only non-SSO users.
- User avatar.
You can also view the logs of your activity in the UI for the current day.
List of Procedures
- Accessing the Settings
- Configuring User Settings
- Managing the Enabled SSO Tenants
- Changing Email Address
- Changing Password (Only Non-SSO Users)
- Activating Two-Factor Authentication (Only Non-SSO Users)
- Deactivating Two-Factor Authentication (Only Non-SSO Users)
- Changing Avatar
- Viewing Logs
Accessing the Settings
Procedure
1. To edit the settings, click Settings at the bottom of the navigation pane in the Console.

The application displays the user settings.
Example:
Back to the list of procedures
Configuring User Settings
Procedure
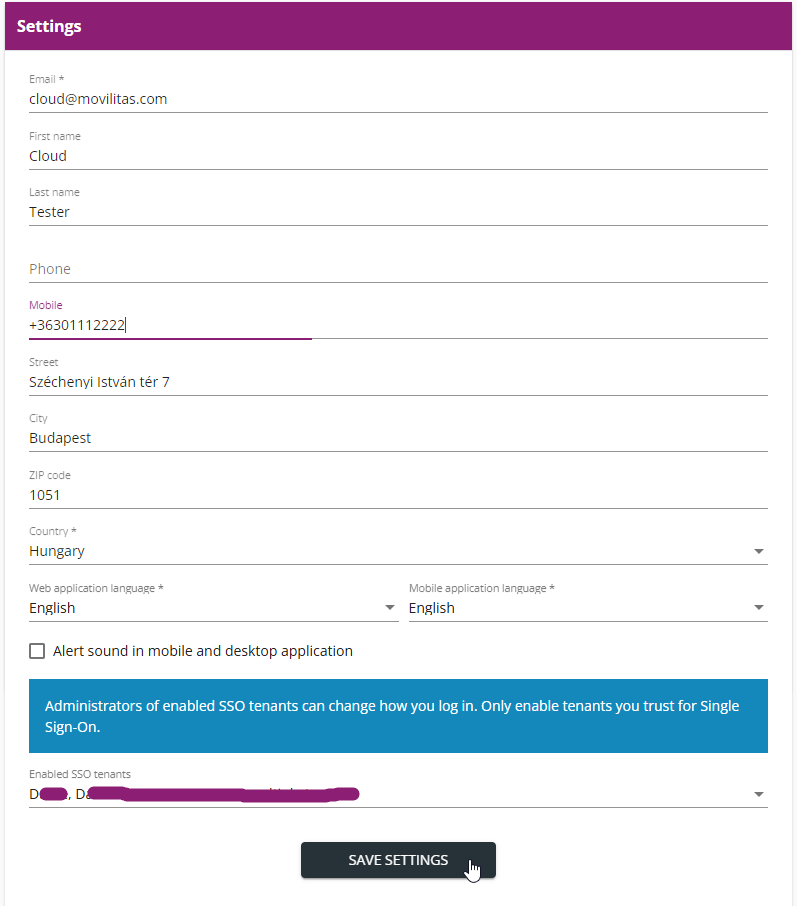
1. On the Settings form, configure the user settings. The required fields are marked with an asterisk (*) in the form.
- First name
- Last name
- Phone
- Mobile
- Street
- City
- ZIP code
- Country
- Web-application language
- Note: When selecting the Arabic language, the layout changes from left-to-right to right-to-left once the user logs out and logs in again.
- Mobile application language
- Note: When selecting the Arabic language, the layout changes from left-to-right to right-to-left once the user logs out and logs in again.
- Alert sound in mobile and desktop application (Android)
- Enabled SSO tenants - Applicable if you are added to at least one tenant where SSO is set up. Select the tenants through which you allow SSO login. For more information, go to Managing the Enabled SSO Tenants.
The following example illustrates a filled-in form:
2. Click Save Settings.
Back to the list of procedures
Managing the Enabled SSO Tenants
When trying to log in through SSO, it is possible that Movilitas.Cloud returns an error message: SSO login is blocked because this tenant is not in your enabled SSO tenants under user settings.
The reason is that you are using the SSO identifier of a tenant that is not selected in the Enabled SSO tenants drop-down in the user settings. This system response blocks unauthorized access to your account. You can select the tenants through which you allow SSO login.
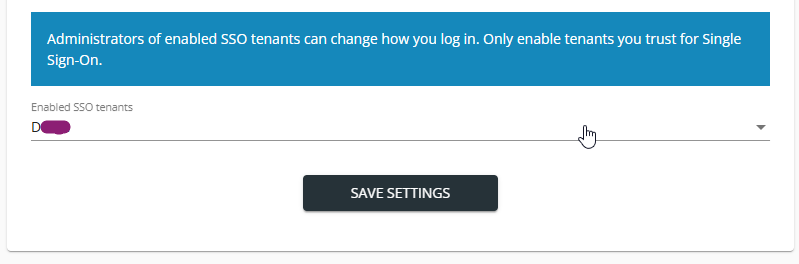
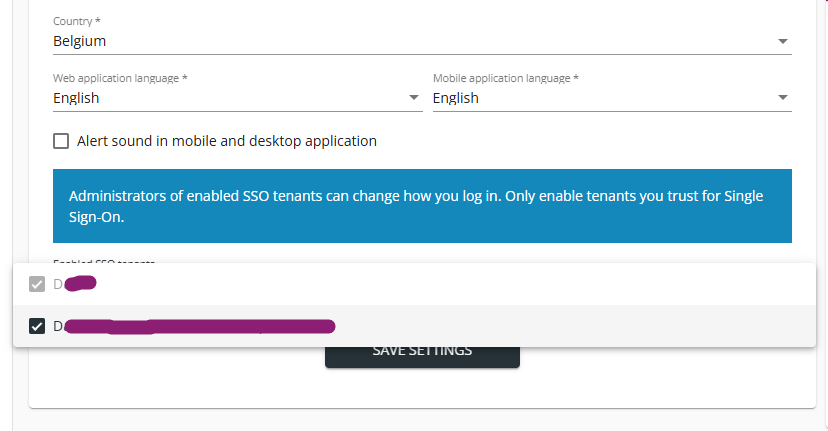
In the Enabled SSO tenants drop-down, the application offers the tenants of the user where SSO is set up. The SSO tenant where you are currently logging in through SSO by using the tenant’s SSO identifier is automatically selected and cannot be cleared (otherwise, you cannot log in to Movilitas.Cloud). The application also displays a message in a blue background that the administrators of the enabled SSO tenants can change how the user logs in.
It is also possible that all the tenants in the Enabled SSO tenants drop-down are selectable/clearable. This situation means that you are a non-SSO user, but you are added to tenants where SSO is set up.
Procedure
1. On the Settings form, open the Enabled SSO tenants drop-down.
Example:
2. Manage the enabled SSO tenants:
- Select the tenant(s) through which you allow SSO login.
- Clear the tenant(s) through which you do not allow SSO login.
The following example illustrates selecting multiple tenants. The user is logging in through SSO by using the SSO identifier of the tenant that is read-only (greyed out):
3. Click Save Settings.
Back to the list of procedures
Changing Email Address
If you change your email address, you need to reactivate your account with the new email address.
Procedure
1. On the Settings form, change the email address in the Email field.
2. Click Save Settings.
The application informs you that you need to activate your account again with the new email address and asks your password for confirmation.
Example:
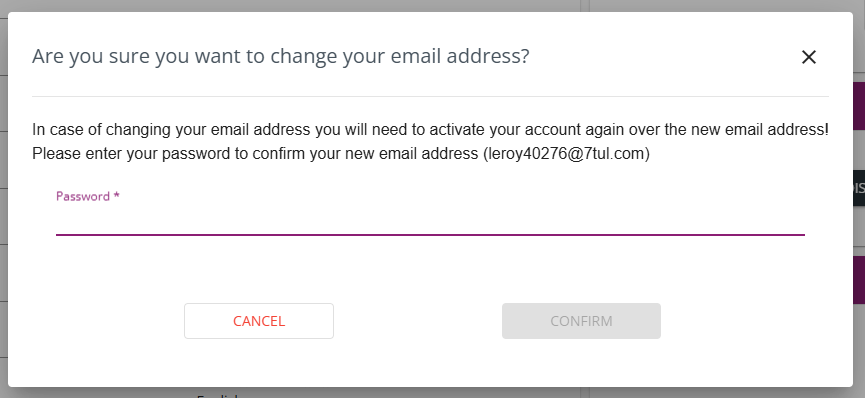
3. Enter your password.
Example:
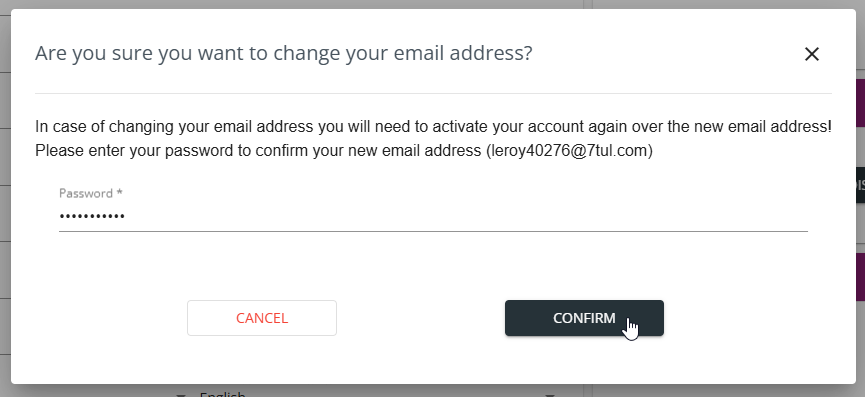
4. Click Confirm.
- If two-factor authentication is deactivated, your email address is changed immediately. You are logged out and the application informs you that an activation email has been sent to the changed email address. Check your mailbox (also spam folder) for the email to reactivate your account.
- If two-factor authentication is activated, you are prompted to give the six-digit code generated by the authenticator application.
5. (Two-factor authentication only) Enter the six-digit code generated by the authenticator application.
Example:
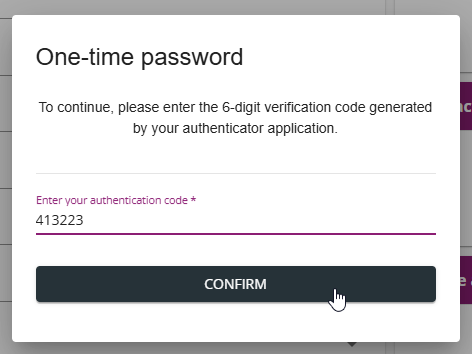
6. (Two-factor authentication only) Click Confirm.
Your email address is changed. You are logged out and the application informs you that an activation email has been sent to the changed email address. Check your mailbox (also spam folder) for the email to reactivate your account.
Back to the list of procedures
Changing Password (Only Non-SSO Users)
Procedure
1. On the Change password form on the right, provide the current and the new password.
Password requirements:
- Minimum 8 characters long.
- Include at least one uppercase letter, lowercase letter, number, and special character.
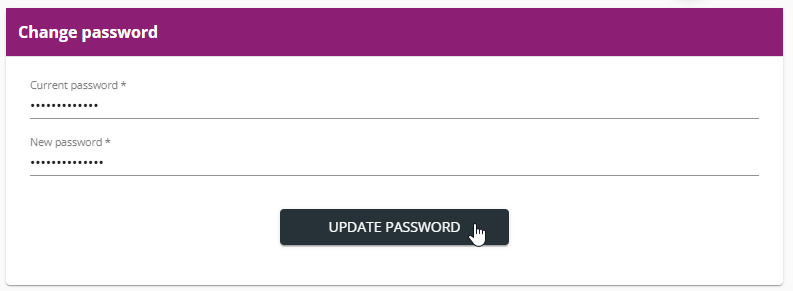
2. Click Update Password.
- If two-factor authentication is deactivated, the password is updated and you are logged out immediately.
- If two-factor authentication is activated, you are prompted to give the six-digit code generated by the authenticator application.
3. (Two-factor authentication only) Enter the six-digit code generated by the authenticator application.
Example:
4. (Two-factor authentication only) Click Confirm.
The password is updated and you are logged out.
Additional information about the password:
- The password expires every 60 days.
- The password can be renewed on this page or through the "Forgot password" functionality.
- When the password is about to expire, Movilitas.Cloud notifies you by email. The email contains a password reset link.
Back to the list of procedures
Activating Two-Factor Authentication (Only Non-SSO Users)
Before You Begin
For two-factor authentication, you need an authenticator application. A common option is to use Microsoft Authenticator or Google Authenticator on your mobile device.
Procedure
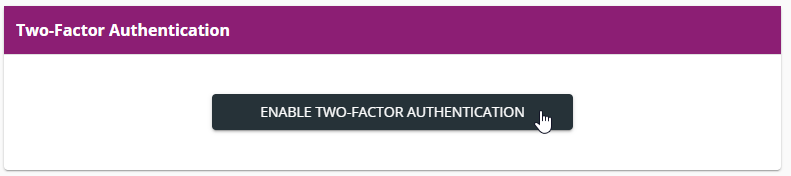
1. On the Two-Factor Authentication section, click Enable Two-Factor Authentication.
Example:
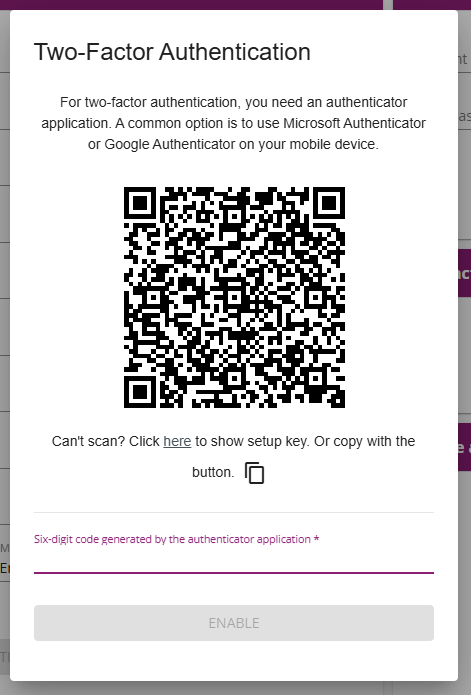
The application displays the Two-Factor Authentication pop-up to link your Movilitas.Cloud user account to the authenticator application.
Example:
2. Open the authenticator application.
3. Scan the QR code by using the relevant button in the authenticator application.
If you cannot scan the QR code, you can view the key by clicking a link or copy the key to your clipboard in the Two-Factor Authentication pop-up. Then, you can manually add the key to the authenticator application.
As a result of this step, an entry with "Movilitas.Cloud" and your email address is added to the authenticator application. The authenticator application starts generating a six-digit code.
4. Enter the code generated by the authenticator application in the Six-digit code generated by the authenticator application field in the Two-Factor Authentication pop-up.
Example:
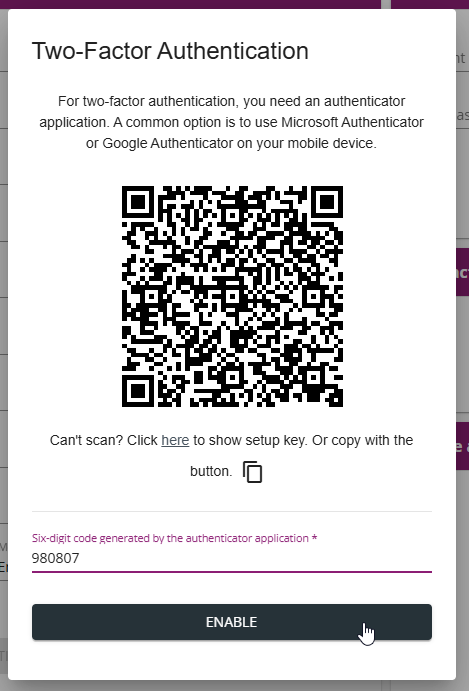
5. Select Enable. The two-factor authentication is activated for your Movilitas.Cloud user account.
As a result, the application will request you to enter a six-digit code during login and other sensitive user actions.
Two-factor authentication applies to all user interfaces:
- Admin UI
- Movilitas Mobile (both web and installed application)
- Movilitas Desktop
Back to the list of procedures
Deactivating Two-Factor Authentication (Only Non-SSO Users)
You can deactivate two-factor authentication at any time. However, as two-factor authentication brings an additional level of security to user access, it is not recommended to deactivate the function.
Procedure
1. On the Two-Factor Authentication section, click Disable Two-Factor Authentication.
Example:
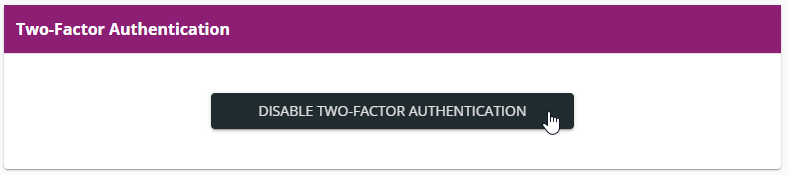
The application asks you to confirm the action.
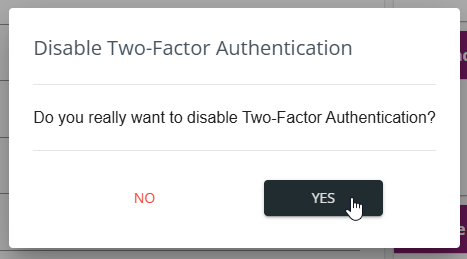
2. Click Yes.
The application requests you to enter the six-digit code generated by the authenticator application as a final confirmation.
Example:
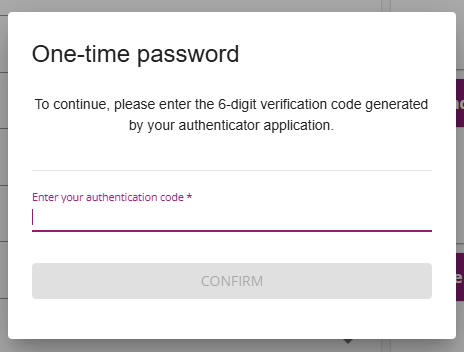
3. Enter the six-digit code from the authenticator application.
Example:
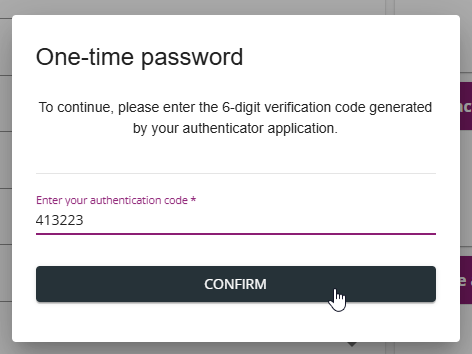
4. Click Confirm.
Two-factor authentication is no longer active for your Movilitas.Cloud user account. You can remove the corresponding entry in the authenticator application. You can reactivate two-factor authentication at any time. For more information, see Activating Two-Factor Authentication.
Back to the list of procedures
Changing Avatar
Procedure
1. On the Change avatar section, click Select Image.
Example:

2. Browse for an image and open it.
3. Manipulate the image.
Example:

4. Click Upload Image.
Back to the list of procedures
Viewing Logs
Procedure
1. On the Logs section, view the logs. The application displays the logs of your activity in the UI for the current day in a paginated view.
Example:

2. Expand a log to view the details by using the > (Expand) icon.
Example:

Back to the list of procedures
